 |
Lots of Wires
That is your first impression on what appears to be a daunting task.
However if you take your time and plan your work it is not a difficult job
and can be fun. A Painless Wiring harness and fuse block were used.
Although a lot of additional custom wiring was needed, their standard system is a
very good investment. |
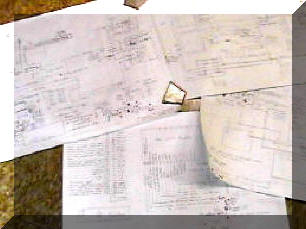 |
Make a Wiring Diagram
The "Stereo Wall" required
extensive wiring. Four 24 x 18 sheets showed all wire routing, including those for the Painless system.
A diagram is not provide with the Painless product. However, laying out their harness and using an
Ohm meter provided 98% of the connections. A call to Painless defined the rest.
|
 |
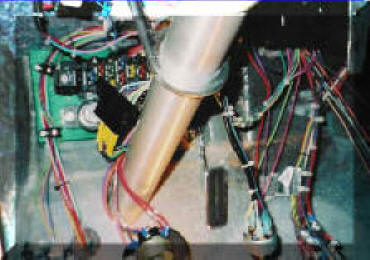
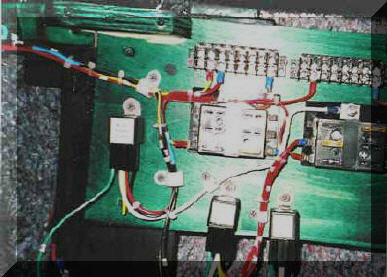
Under Dash Wiring
If you thought the top photo looked messy (it showed the
Painless fuse panel attached with epoxy to the firewall using a fabricated
mounting board) the photo to the left shows the area above that! It's the Dakota Digital dash
control box. You can see one of the many terminal strips used to keep
the wires neat.
|
 |
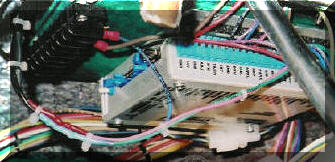
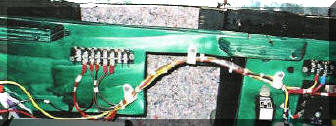
REAR WIRING
Extensive custom wiring was required in the rear for the Stereo Wall
; Dakota Digital Remote Control box ; Optima Battery; Alarm System; Remote Starter Solenoid
and Electronic Antenna. Because of the distances,
it's wise to use some power relays (shown with white labels) A number of fuses were needed
and two small 6 fuse panels were used. The relays keep wires
carrying power short and allow small mini switches to active high power
consuming devices.
|
|
 |
These photos show some of the
elaborate wiring in the rear. Use a lot of twist ties as you go along.
A roll of twist tie material, bought from the "Dollar Store" worked
fine. You can untwist and add another wire and use nylon wire ties when you're
finished. They are inexpensive and keep you your work neat.
|
|
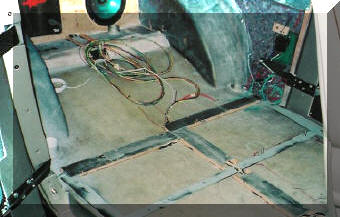 |
To route the many wires from the front to the rear
and to the doors, wood
strip
channels were epoxied to the floor and covered with 1/16 thick aluminum .
This is all covered by the floor insulation and carpet. |
|
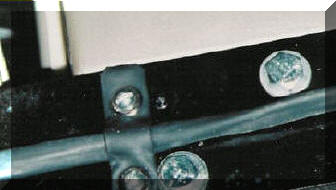 |
DOOR POWER
The door wires were simply routed along the lower
hinge. You can see the clamp fabricated and covered with
shrink tubing. Small screw threads were drilled and taped into the hinge. So the wires would not bind in the rear panel, a light
spring was installed that keeps the wires clear and untangled. Clever and
inexpensive.
|
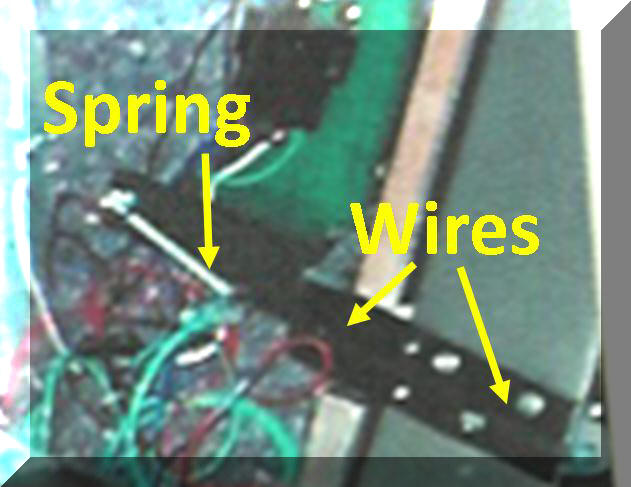 |
The spring was attached to the wire bundle
coning from the door along the bottom door hinge. The other end is
attached to the body behind the interior body panel. It lays flat and
keeps the wires from tangling when the door is closed |
|
 |
Employed a special circuit so a Backup Horn would
sound when the Lokar shifter reverse switch energized the two 55 Watt Backup Lights (and rear
fog lights.) A Dash Switch can also turn on the Rear Fog Lights
without the horn sounding! Just need a Diode. |
|
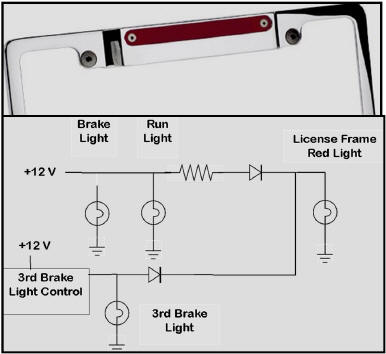 |
A circuit was used to activate the red light on
the Billet Specialties License Frame to perform two functions. The
light is very bright when used as a third brake light. However an
added running light would also be useful. A resistor was added (of
the correct resistance and wattage) to reduce the light output for a running
light. A connection was also made to the 3rd brake light controller to
proved full voltage when
both brake lights were activated (and not with a single turn signal.) Note the two diodes used to prevent energizing the light at
the wrong time. |


 ngineering
a 1934 Pro Street Rod
ngineering
a 1934 Pro Street Rod