|
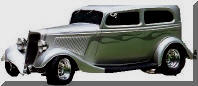
The air conditioning and heater hoses need to go from the
front of the engine into the passenger compartment. Bulkhead fittings
can be purchased but what to do with the hoses along the engine
compartment? Saw this solution at a Rod Show. It was custom built.
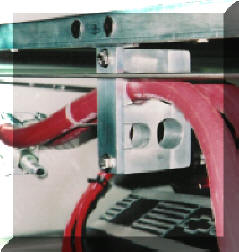
We built this one from three pieces of 1 inch thick aluminum.
First a slice 1 inch in depth was cut from the block. Bolt holes
were drilled and taped into that piece to hold the assembly together. Then
using the proper hole saw size, four holes were made in the assembly.
Attached to the hood support bracket with flathead stainless bolts.
Red hose was just for the trial, all final hoses are black. |
 |
|
After bleeding the brakes a number of times then swapping
the silicon brake fluid supplied by TCI for DOT 4, finally got rid of the spongy brakes. But the
peddle would stay on the floor-not good !! TCI said "may need" a
return spring. Why my ride?? Oh well, found a company who sold a
spring that fit over the control rod, but it wouldn't fit my arrangement!
A simple spring (photo) was attached to a hole made in a large washer placed
on the peddle bolt and to a
small bracket attached to the frame. Works great! |
 |
|
Probably didn't need it but installed a vacuum reservoir
anyway. Since the Vintage Air works with vacuum actuators didn't want
to find my power brakes were not getting a full vacuum. Has worked
great, never a problem. It fits up in the frame rails. Did fine
I needed a special vacuum hose that doesn't collapse! |
 |
|
A Holley blue pump puts out enough fuel for the Big Block.
It was placed along the frame rail near the tank so it was pushing with its
16 pound pressure up the 7 psi regulator mounted on the frame rail near the
engine. Branded line was used except for the short run of rubber fuel hose
from the K&N filter to the pump. A low oil pressure shut-off switch
was added. It will shut-off the pump when oil pressure
drops. |
 |
|
Braded Stainless line were used for fuel lines and in this case
the line from the TH400 Trans to the B&M oil cooler. That small braded
line was installed from the oil pressure gauge hole at the rear of the block
to a remote location. No room for it in the engine compartment, nor
would it look good! A 90 degree fitting is all you see up top. |
 |
|
Suicide doors were the appropriate name for these rear
hinged safety issues! 1934 was the last year for Ford. These
pins were installed to allow one to be sure they stay closed. They
have an alarm buzzer is the ignition is on and they aren't! The Dakota
Digital remote also has a safety feature not allowing the doors to open if
the engine is running! What is you lock the door with the key on?
The hidden switch will still work. Be sure you install one! |
 |
|
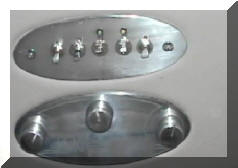
Small bat switches look great and take little room. Some
are momentary. The ones on either end are double through momentary and
operate the windows up an down. One turns on the electric fans (it has a
green LED above it), another turns on the rear fog lights (it uses an amber
LED) and the last is a momentary that bypasses the oil safety switch so we
can turn on the fuel pump manually when we haven't started the car for a
while. The Aluminum plate was made to match the Vintage Air Control
shape. |
 |
Click to See a List of Vendors Used to
Build This ProStreet '34 |
|
"WARNING:
"Weld
Safely" |
|
▲ HOME
►GSS
PRODUCTS |